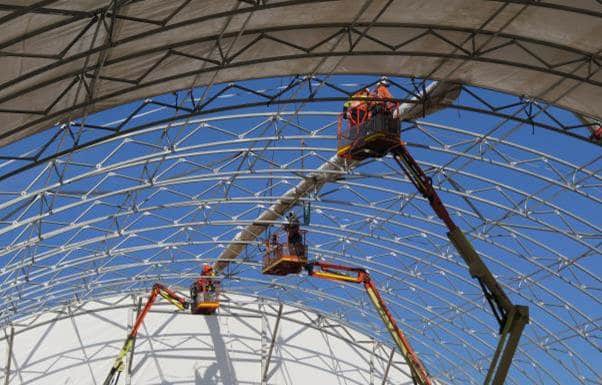
Installing Fabric Structures
Planning your installing:
1. Installing fabric structures with your own team - The Allshelter fabric structures come with a detailed install manual. Your team will need the basic handyman skills, the equipment needed to get to the apex of the structure and a welder. We are happy to offer phone support when required. In the video section there will be a slection of videos to walk you through the process.
2. Use our supervisor - We can supply a supervisor for your team for installing fabric structures. This will speed up the process, and you will have the comfort of having an expert on site.
3. Have our team install it for you - We can quote you to carry out the installation with a full team. Any equipment you can supply will help defay the costs.
How long does it take? - For a 12m wide x 12m long shelter mounted on containers it will take about 2 days with two installers. If it is windy it will slow the team down and the fabric may have to be pulled across early in the morning when the wind is at its lowest.
For the larger shelters we usually work with a team of 4-6 riggers. If it is windy, then this slows down all operations as it is slower to fit the frames in place, and harder to manage fabric safely. In hot areas you dehydrate much quicker working at heights and need to take shade and water breaks constantly. Normally we will not pull a cover if the wind is over 15km/h coming from the end, the wind at the apex can be double what you feel on the ground. For a 20m wide x 60m long container structure secured with ballast we would budget eight days with six installers plus 4-5 days welding. (see the process below.)
Or teams are equiped to install structures in regional, remote and overseas regions
The process of installing a fabric structure:
For the above 20x60m structure the process for the 8 days will be planned as below. The eight day has spare time in case we are held up with wind. There were three separate structures (24 + 24 + 12m long) and if there was a day with no wind, all the covers may be pulled in the day and secured, to be tensioned the following day.
- Day 1 Site Induction and check packs, mark out site, start welding
- Day 2 Place containers, start joining frames, weld plates & spigots.
- Day 3 Stand frames and end wall, weld plates & spigots.
- Day 4 Stand frames and end walls install braces, weld end walls
- Day 5 Install concrete blocks, Install cover and tension
- Day 6 Install concrete blocks, Install end wall and door
- Day 7 Install Cover and tension
- Day 8 Final cleanup and QA check
Maintenance:
If you have an extreme wind event it pays to check the structure. Focus on the ratchet straps and if any have come loose re-tension them. When you are tightening them there should be room to have one more click on the ratchet when you have finished.
The most force will be on the end ratchets so also check the stitching on the tension pipe pocket.
If you have accidently holed the fabric contact us immediately and we will send a patch kit. The fabric is non-tear but it is best to repair ASAP incase there is a further major wind event.
For extensive damage contact us for advice. Take plenty of photos in all situations and give us the measurements of the damaged area.
Allshelter original polyethylene covers needed replacing every 8-14 years, with the new ones, with a higher UV rating should last 15-20 years. White covers reflect the UV and last longer than coloured ones. When the cover is replaced it comes with new ratchet straps and tension pipes.
If you are in a corrosive environment it pays to spray the ratchets annually with fish oil or a repellent like WD40.

Contact Taurus
If you would like more information fill in your contact details in the top 3 lines.
The lower star marked "*" tick items, which are relevant, will help us to respond more efficiently.
Taurus Fabric Build Mob: 0400 030 835, Email: [email protected],
Office: The Bunker, 79 McLeod St Cairns QLD 4870, Australia
